This guide walks you through practical, shop-style techniques you can use at home to troubleshoot and repair common automotive electrical problems, plus maintenance habits that prevent failures before they start.
Understanding Your Car’s Electrical “Backbone”
Before you touch a wire or pull a fuse, it helps to understand the basic layout.
Every electrical circuit in your car follows the same path:
- Power source – the battery and, with the engine running, the alternator.
- Protection and control – fuses, relays, and sometimes control modules.
- Switches and sensors – the driver’s control (like a headlight switch) and any sensors that feed data.
- Load – the component that actually does work (bulb, motor, solenoid, etc.).
- Ground – the return path to the battery’s negative terminal, usually through the body or frame.
When something stops working, you’re looking for a break or extra resistance somewhere along that chain: no power, no ground, or a bad connection in between.
Key mindset:
- Treat each circuit as a loop.
- Always ask: Do I have power? Do I have ground?
- Don’t guess—test. A $20 multimeter can save you hundreds in parts you don’t need.
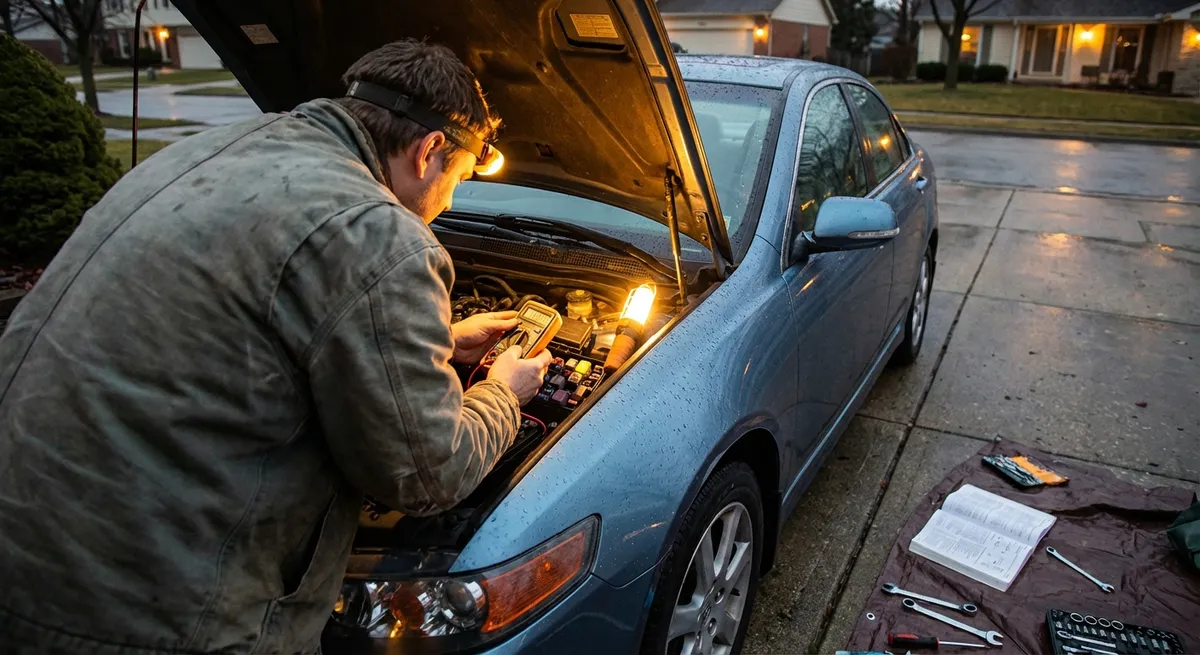
Safety and Tools: Set Yourself Up Like a Pro
Working on electrical components can be safe and efficient if you prep properly and respect the risks.
Basic safety rules:
- Disconnect the negative battery terminal before working on airbag systems, main power cables, or when removing large electrical components (alternator, starter, etc.).
- Avoid short circuits. Never jump a fuse with wire or foil; always use an appropriately rated fuse.
- No jewelry while working—rings and metal watches can arc against live circuits.
- Work in a ventilated area and keep sparks away from battery vents and fuel sources.
Essential DIY electrical toolkit:
- Digital multimeter (with volts, ohms, and continuity modes)
- Test light (for quick power/ground checks)
- Quality wire strippers and crimpers
- Assorted heat-shrink connectors and butt splices (avoid bare twist-and-tape)
- Electrical tape and heat-shrink tubing
- Small pick set and terminal release tools (for depinning connectors)
- Contact cleaner (for removing oxidation from terminals)
- Wiring diagram (vehicle-specific—often available online or in service manuals)
Having these tools transforms electrical repair from guesswork into a straightforward test-and-confirm process.
Professional Tip #1: Diagnose Lights and Accessories with Voltage Drop, Not Just Continuity
Most DIYers check for “continuity” and think a wire is fine if their meter beeps. In the real world, a corroded or partially broken wire can pass a low-current continuity test but fail under load.
Use a voltage drop test instead:
- Leave the circuit assembled and turned ON (for example, headlights on).
- Set your multimeter to DC volts (20V scale or auto-range).
Test the power side:
- Place the black meter lead on the battery negative terminal. - Place the red meter lead on the power wire connector at the load (e.g., headlight plug power terminal). - You should see close to battery voltage (usually 12–14V). If it’s much lower, you have resistance somewhere between the battery and the component (bad connection, corroded wire, weak relay, etc.).
Test the ground side:
- Keep the circuit ON. - Place the red meter lead on battery positive. - Place the black lead on the ground wire or metal case of the component. - You should see less than 0.1–0.2V on most lighting/accessory circuits. Higher readings mean excessive resistance in the ground path (rusty ground, loose bolt, corroded connector).
Why this works: Voltage drops show you where the circuit is “losing” voltage under real load conditions. That’s exactly how professionals track down dim lights, slow motors, and intermittent accessories.
Professional Tip #2: Fix Dead Power Windows and Door Locks the Smart Way
Power windows and door locks are among the most common electrical complaints, and most are caused by a handful of predictable issues.
Step-by-step approach:
Check the simple stuff first:
- Verify the window lock switch isn’t engaged. - Check the owner’s manual for the fuse location and inspect the fuse visually and with a test light.
Compare driver and passenger controls:
- If the window works from the driver master switch but not from the passenger switch, the passenger switch or its wiring is suspect. - If it doesn’t work from either switch, focus on the motor, wiring, or shared power/ground.
Listen for activity:
- Hold the switch and listen at the door. - No sound at all: likely no power/ground reaching motor, failed switch, or broken door harness wires. - Clicking or slight movement: motor may be failing mechanically, not electrically.
Test at the motor connector:
- Remove the inner door panel carefully (document clip locations and screws). - Back-probe the motor connector. - With the key ON and switch pressed, use a multimeter to check: - One wire should show power (12V) in one direction and the other wire power when you press the switch in the opposite direction (for reversible DC motors). - If you have correct power and ground polarity at the motor but no movement, the motor/regulator assembly is likely bad. - If you don’t have power/ground at the motor, trace back to: - Door switch - Body-to-door harness (rubber boot area) - Related fuses and relays
Common failure point: The wire bundle that passes through the rubber boot between the door and body often develops broken or partially broken wires due to constant flexing. Gently peel back the boot and visually inspect, then test continuity or voltage on suspicious wires.
DIY repair hint: If you find a single broken wire, cut back to clean copper on each side, crimp in a short repair section with heat-shrink butt connectors, and secure the harness so it doesn’t stress the same point again.
Professional Tip #3: Kill Battery Drains with a Systematic Parasitic Draw Test
If your car is fine when you drive daily but the battery dies after sitting a day or two, you may have a parasitic draw—something staying on when it should be asleep.
How to test for parasitic draw (with a multimeter that has an amp setting):
Prepare the vehicle:
- Turn everything OFF: lights, HVAC, radio, accessories. - Close all doors (use the latch with a screwdriver if you need the door open, but keep the switch “tricked” into thinking it’s closed). - Lock the car and wait 20–45 minutes for all modules to go into sleep mode (varies by vehicle).
Set up your meter:
- Set the multimeter to amps (A) and plug the leads into the correct ports (10A or higher fused port for safety). - Disconnect the negative battery cable. - Connect the meter in series: - One lead to the negative battery post. - The other lead to the negative battery cable end. - Do not turn anything ON while connected; you can blow the meter fuse.
Read your draw:
- Modern vehicles often settle in the 30–50 mA (0.03–0.05 A) range; check a service reference for your specific car. - Anything significantly higher (e.g., 150–300 mA or more) is suspect.
Isolate the circuit:
- With the meter still inline, pull one fuse at a time from the interior/under-hood fuse panels. - When the current drops dramatically, you’ve found the problem circuit. - Check what that fuse feeds (radio, body control module, trunk light, aftermarket remote start, dash cam, etc.).
Common culprits:
- Glove box, trunk, or vanity mirror lights that stay on
- Faulty door jamb switches
- Aftermarket stereos, alarms, or dash cams wired incorrectly
- Failing modules that never go to sleep
Once you know the circuit, inspect components, unplug accessories one at a time, and retest the draw to pinpoint the exact cause.
Professional Tip #4: Cure Poor Starts by Testing Voltage at the Starter, Not Just the Battery
A slow crank or click-no-crank condition isn’t always a bad battery. Voltage can be lost in tired cables, corroded terminals, or worn connections.
How to test the starter circuit like a pro:
Confirm battery health first:
- With engine off, healthy batteries should show around 12.4–12.7V at rest. - If voltage is low, fully charge and load-test the battery before chasing wiring.
Check the main power cable:
- Set multimeter to DC volts. - Place black lead on battery negative. - Place red lead on starter main power terminal (the large cable from the battery). - Have a helper try to crank the engine. - Reading should stay close to battery voltage during crank. A significant drop here suggests a bad battery, weak alternator (if not recharging properly), or major wiring resistance.
Check starter ground path:
- Place red lead on battery positive. - Place black lead on starter housing (bare metal spot). - Have a helper crank the engine. - Voltage should remain below 0.5V. Higher indicates poor ground between engine, chassis, and battery negative.
Check the solenoid trigger wire:
- Identify the smaller wire at the starter (from ignition switch/relay). - With meter on DC volts, black lead to ground, red lead to the small terminal. - During crank, you should see close to battery voltage. - If there’s no voltage here when you turn the key, the issue is upstream: neutral safety switch, ignition switch, relay, or control module.
DIY maintenance step: Clean battery terminals and the main engine/chassis ground points with a wire brush. Tighten them properly and apply dielectric grease to slow future corrosion. Many “bad starters” turn out to be bad connections.
Professional Tip #5: Maintain Connectors and Grounds to Prevent Future Electrical Failures
Electrical components rarely fail in isolation. They almost always sit in an environment that either preserves them or slowly destroys them.
Adopt these preventive maintenance habits:
Inspect key grounds yearly:
- Look for the heavy ground cable from battery negative to body, and from body to engine or transmission. - Check for: - Loose bolts - Corrosion (green/white deposits or heavy rust) - Frayed or stiff, cracked insulation - Remove, clean contact surfaces to bare metal, reinstall securely, and apply dielectric grease or a corrosion inhibitor.
Protect connectors in harsh areas:
- Underbody, wheel wells, and front bumper harnesses see the worst conditions. - When you have connectors unplugged for other work, inspect for moisture, green/blue corrosion, or bent pins. - Clean with electrical contact cleaner, allow to dry, then apply a small amount of dielectric grease to the seal area (not to drown the contacts).
Avoid “vampire” taps and twist connections:
- Cheap Scotchlok-style taps and bare twist-and-tape jobs cause intermittent issues down the road. - If you must splice: - Use proper crimp connectors with heat-shrink. - Route and secure the harness so the joint isn’t in a flex or pinch point.
Respect current ratings:
- Never install a higher-amp fuse than specified; that protects the wire, not just the component. - When adding accessories (lights, stereo, inverter), use a proper fused power feed from the battery and size the wire according to current draw and length.
Keep moisture out:
- Check grommets where wiring passes through the firewall or body. - Replace cracked or missing grommets to keep water out of both the cabin and connectors.
These small maintenance steps prevent many of the “mysterious” electrical gremlins that cost time, money, and nerves.
Conclusion
Electrical problems intimidate many DIYers, but they don’t have to. With a basic understanding of how circuits work, a few core tools, and a methodical approach, you can handle most light to moderate electrical issues in your driveway.
Focus on three principles:
- Test, don’t guess—use voltage and voltage drop, not just continuity.
- Think in complete circuits—power, control, load, ground.
- Protect what you fix—clean, solid connections and proper sealing will outlast quick, sloppy repairs.
Treat your vehicle’s wiring like the critical system it is, and you’ll save money, avoid repeat failures, and gain a level of confidence most drivers never reach.
Sources
- [National Highway Traffic Safety Administration (NHTSA) – Vehicle Maintenance](https://www.nhtsa.gov/equipment/vehicle-maintenance) – General safety and maintenance guidance, including electrical safety considerations
- [AAA – Car Battery and Electrical System Basics](https://www.aaa.com/autorepair/articles/how-long-does-a-car-battery-last) – Explains battery behavior, testing, and common electrical system issues
- [Motor Magazine – Voltage Drop Testing Fundamentals](https://www.motor.com/magazine-summary/voltage-drop-testing/) – Professional-level explanation of voltage drop testing for accurate electrical diagnosis
- [Delaware Technical Community College – Automotive Electrical Systems Course Material](https://www.dtcc.edu/sites/default/files/automotive-service-technician-electrical-systems.pdf) – Educational overview of automotive electrical fundamentals and circuit operation
- [MIT – Basics of Electricity and Circuits (OpenCourseWare)](https://ocw.mit.edu/courses/res-6-001-continuum-physics-fall-2003/resources/basics-of-electricity/) – Foundation concepts on voltage, current, and resistance relevant to understanding vehicle electrical systems